


Hey everybody! CHRISTMAS IS COMING!! I couldn’t be more excited!
One of my favorite things about Christmas is coming home to find Christmas cards in my mailbox. Rather than just set them out on my entry table like I normally did in past years, I thought it would be fun to make something to hang the cards.
You have to see what I came up with! I LOVE it! Make sure you scroll down to the end of this post to see the video, too!
I made this DIY with the help of my trusty Ryobi tools!

15 Amp 12 in. Sliding Miter Saw with Laser
ONE+ 18-Volt Lithium-Ion Cordless Hammer Drill Kit
18-Volt ONE+ 1/4 Sheet Sander
I used up some of the old trim that we had kicking around after we replaced the trim in our living room and I also used a scrap piece of wood that I found in the shed.

You could easily go down to any home improvement store and buy these supplies if you want to recreate this project. I just happened to have all this stuff kicking around because I never throw anything out — for this exact reason.
I started by cutting my trim. I was lucky enough that the ends of my trim were already cut at a 45° angle so all I had to do was cut the other end.
This is super easy with my sliding miter saw from Ryobi! All I have to do is slide it to the 45 mark and cut. That’s it!


I set my scrap piece of plywood down vertically on my workspace and then I laid my piece of trim across it horizontally. I measured and cut my first piece of trim at 30″.
Next, I just continued to cut my pieces of trim but making them smaller each time. I would line them up above the last one before cutting just to make sure they were right.


For the top of the tree, I cut two triangles and then placed them together to make a point.

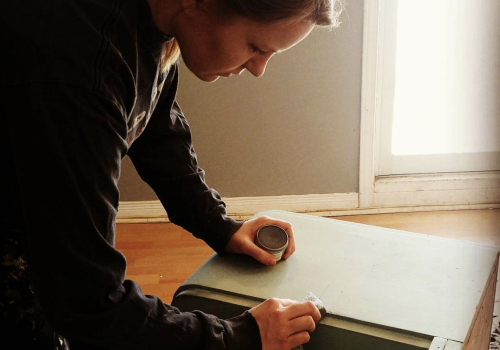
Before attaching the trim to the piece of plywood, I wanted to paint it.
I used Vintage Effect Wash from Decoart. I love this stuff! It’s great for the rustic look! You can use it over raw or finished surfaces to achieve a light and washed-out look.

I just brushed it on the plywood and then wiped it with a soft cloth. You can see how great it works in the video at the end of this post.
I gave it time to dry and then I attached the trim to the plywood. To do this I used my Ryobi drill and some screws. Always make sure you drill a pilot hole first before drilling into the trim!
After the trim was all attached I painted the tree green and let it dry. I followed it up by applying more Vintage Effect Wash over the green but this time I used the white shade.


Let that dry and then all that was left was to add some clothespins. I just secured these using hot glue.
You can see it all come together by watching this video!


If you like this DIY, make sure you share it with your friends!

[…] 7. Christmas Tree Greeting Card Holder […]